Monday, December 13, 2010

Holiday Decor: Advent Calendars


DIY Printable (PDF) Advent Calendar - Homemade Happiness.


Farmhouse Garland Advent Calendar Kit - Hello Magpie.


DIY Advent Tree - Image credit + instructions via Sunset.

Simple, modern twists on a classic childhood decoration--I like them all!

Saturday, December 11, 2010

Spiced Pine Cones


  1. Buy a bag of pine cones or gather your own. Scrub the dirt off the pine cones as you rinse them under warm water and stack them.

  2. Place the pine cones on an old baking pan with two inches between the pine cones on all sides.

  3. Preheat your oven to 300 degrees. Slide the pine cones into the oven and set the timer for one hour to kill any bacteria. When the timer goes off, remove the cones and place onto newspaper.

  4. Collect the spices that you want to use as seasoning for your pine cones. Popular options include ground cinnamon, ground nutmeg and ground clove.

  5. Sprinkle the spices onto the pine cones. Coat them well by turning the pine cone over and sprinkling spices on all sides. Tap off excess spices.

  6. Allow cones to dry then tuck them into a basket and place near your fireplace.

Crafty idea via how to - image credit © Julie Magers Soulen, 2010.

Tuesday, September 21, 2010

DIY: Photo Headboard


Photo Finish
To add color and personal style to your room, create a photo headboard. It's an unexpected way to display your favorite pictures or art prints, and frees your bedside table from space-hogging picture frames.

Instructions:

1. Sand a hollow core door (available at HomeDepot.com); remove dust with tack cloth. Apply a coat of primer to all surfaces; let dry.

2. Apply two or three coats of paint to all surfaces, letting dry after each coat.

3. Measure and mark desired placement of photos. Using tape on the backs of photos, attach them to door where marked.

4. Center a clear acrylic sheet (available at HomeDepot.com) over each photo; screw into place at each corner.

5. Screw large picture hangers to back of headboard, several inches from upper edge near each side. Slip wire through loops, pulling taut. Wrap wire ends around center wire. Trim excess.

6. Attach nail to wall above center of bed; hang headboard on nail. (Be sure the picture hangers, wire and nail are heavy enough to carry the weight of your headboard.)

Project idea and image shared from Woman's Day - Photo credit: Keith Scott Morton

Monday, June 28, 2010

8 Other Things


Did you know...
you can clean more than just dishes in your dishwasher.

Rain boots should have the liners removed and lie horizontally. Hook flip-flops on tines in the top rack. (FYI, Crocs are not dishwasher-safe.)

Tools with metal or plastic handles will be fine. Towel-dry afterward to prevent rusting.

Ceramic cabinet knobs do well in the silverware basket, so if you feel like embarking on the process (remove, wash, replace), go for it.

Hairbrushes
and combs made of plastic can take a spin, but not wood or natural boar-bristle brushes. Be sure to remove all the hair first to protect the drain.

Fan grilles, switch plates, and vent covers are in if they’re plastic, aluminum, or steel. Enameled, painted, or plated should stay out.

Garden tools
may have come in contact with pesticides or animals, so don’t mix them with a load of dishes. (And don’t wash those with wood handles.)

Light-fixture covers are fine in the top rack, as long as they’re not antique, enameled, or painted.

Potatoes can get nice and clean in the top rack with a rinse-only cycle (no detergent). Sound crazy? It makes mashed potatoes for 20 a lot quicker.

Retro-style dishwasher by SMEG (I know, cute, huh?).

Info shared via - click for a list of 14 more!

Saturday, March 13, 2010

DIY Project: No Sew Curtains


Metal clips (I have some from Ikea--love 'em!)


Metal grommets + rayon cording


Vintage (or vintage inspired) metal decor clips


Metal grommets + wall hooks


Buttons + ribbon


Iron-on fusing tape

Call me artistic, say I'm crafty, but do not count sewing among my talents. I've tried...and failed. Handwork, yes, but sewing machines wish for legs to run fast and far if I am near. Trust me, I'm not making this up. Two lovely words: NO SEW. All these ideas look quick, easy and appealing. Now the only thing you need to do is hunt down the fabric or, even better, ready made panels!

Idea and images via.

Thursday, October 15, 2009

DIY Project: Wallpapered Tea Cart


Wallpaper. Cart. The Power of Mod Podge. What else do you need to know? Well, how about how to make one for yourself? Linkage is below...

Found here and she found it here {which is where you can find the tutorial info!}

TIP: You can find fun vintage wallpaper in smaller quantities on Etsy--search the keywords: VINTAGE and WALLPAPER.


Thursday, July 9, 2009

Garden Inspiration: Arbors and Trellises


Sunday, May 24, 2009

DIY Project: Upcycled Hallway Console


before


after

How they did it:

Buy tables at a yard or garage sale, thrift store, Goodwill, off Craigslist or scavenge from a friend or family member.

1. Removed the drawer handles, lightly sanded all surfaces with sandpaper, and wiped with a damp cloth.

2. Applied one coat of primer and three coats of Benjamin Moore’s high-gloss Bunny Gray paint (2124-50), letting it dry between coats.

3. Painted the tabletops with a chevron pattern (or create your own design) using a stencil created from 1- and 2-in.-wide painter’s tape, applying two coats of high-gloss white paint (2-oz. sample jar).

4. Replaced the handles.

Time: 1 weekend

Cost: $38 for primer and paint

FOUND HERE.

Thursday, May 14, 2009

DIY Project: Mirror Headboard

Arrange small light weight mirrors grid-style for a glamorous regency-style look in the bedroom. I really like this idea for the glam factor and because it would bring extra light into any space.


Sorli mirrors available at Ikea - 4 pack/$4.99

Wednesday, May 13, 2009

Garden: Grow veggies in 2-4 square feet


For anyone that loves fresh veggies but is short on space or maybe you just doesn't want the upkeep...this might be just your ticket for a mini garden this summer.  

TOMATO
In a sunny 2-foot square bed, tuck a single plant. Prolific varieties include 'Sun Gold', a cherry type, or 'Early Girl', a medium slicer. 

+ BASIL
In a 3-foot square bed, grow three basils and a tomato plant.  Perfect for making pesto and for pairing with tomatoes and mozzarella in summer salads.

+ CHIVES & CUKES
In a 4-foot square bed, add a row of chives beyond the basil, then plant a single cucumber vine.

Discovered HERE.

Tuesday, May 12, 2009

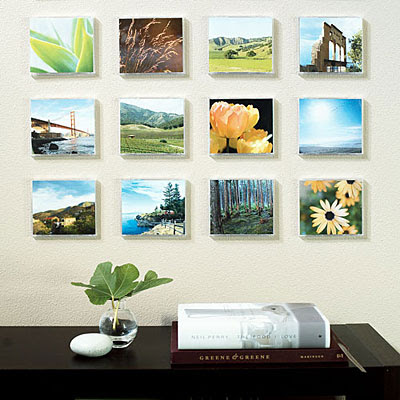
Series: Photo and Art Display - Recycled CD case grid

Recycle your unused CD cases and create a quilt-like grid collection of landscape photos.


DIY instructions found HERE.

Tuesday, April 28, 2009

DIY Project: Personalized Ikea End Tables


Personalized end tables on the cheap? Yes, please. These LACK tables were originally from Ikea, purchased used on Craigslist, personalized with the floral design and presto, change-o...DIY designer tables!

I'm thinking: save time and effort by using vinyl decals, easily sourced on Etsy.

Steal this idea--DIY instructions found on the Craft Nest blog right HERE.

Monday, April 20, 2009

DIY Project: Recycled Circle Frames

Circularize your photos and show them off in a urban-chic constellation of modular cardboard rings.  Snappy-lookin’, expandable, and keeps your paper towel rolls out of the landfill. What’s not to like?


To make your own find step-by-step instructions HERE.

Wednesday, April 15, 2009

DIY Project: Bookcase Makeover


Got an old bookcase in need of a facelift? Don't have a bookcase but could find one at a yard sale, on Craigslist or in the Ikea clearance room for 50% off?  Loving this idea for yet another project?  Yeah, me, too!

DIY instructions right HERE.

Monday, April 6, 2009

DIY Project: Outdoor Chandelier


Create an enchanting retreat in a corner of your yard with a chandelier you can make in an hour. All you need is a wire basket, a few glass jars, and some chandelier crystals.

Pick out a wire basket with a handle and a flat base (find at home and garden shops, online auctions, and thrift or antique stores). Some are designed to hold glassware or small pots ― the built-in partitions will hold your jars in place.

Hang your crystals from the base and top; for a very fancy look, loop two strands of glass beads across the bottom.

Attach your chandelier to a patio roof or tree with a length of matching chain or a metal plant hanger. When you're seated, it should float just above eye level. Place tea lights or votives in the jars, light the candles, and enjoy the glow!

Seattle's Swanky Nest has a great selection of baubles.

Project and image via Sunset - FOUND HERE.

Tuesday, March 31, 2009

DIY Project: Wood Storage Cubbies

Nursery pots and planting paraphernalia stay put in these cleverly constructed garden shelves. The up slanted edges of the shelves were inspired by nesting boxes in chicken coops. So clever and space saving!


The DIY project instructions for this can be found here.

Saturday, March 28, 2009

DIY Project: Chair Revival

Turn a drab thrift-store chair into a stylish accent for any room in your home. All it takes is some paint, fabric, basic supplies, and a free weekend. To start, choose a chair with no missing screws or loose legs; it should have interesting features or frame detail.


For a slightly more ambitious project, turn two or more chairs into an eclectic set. Look for designs that have a wooden frame and an upholstered seat and unify them with the same color and fabric.

Materials and directions
Screwdriver
Sanding sponge
Tack cloth or rag
Small paint roller
2-in. paintbrush
Primer
Paint
Fabric
Chalk or pencil
Scissors
Staple gun

How To:
Step 1: Unscrew the seat from your chair frame with a screwdriver. Set seat and screws aside.

Step 2: Sand the frame. Use tack cloth or a damp rag to wipe up the dust.
Step 3: Use a small paint roller to cover frame with primer, then follow with the 2-in. paintbrush to fill in joints. Let dry at least two hours, then apply a second coat of primer. Once dry, sand and tack again to create a smooth finish before painting. Clean roller and paintbrush.

Step 4: Apply a base coat of paint with the clean roller. Smooth all surfaces with the paintbrush using long, straight strokes in one direction. Apply a second coat after the first is dry (don't sand between coats).

Step 5: While the frame dries, re-cover the seat. Pull off the old covering or apply the new fabric over it. Measure and cut a piece of fabric about 2 inches wider than the seat on all sides, first tracing an outline with chalk or a pencil. If the fabric pattern includes stripes, make sure they align with the seat shape.


Step 6: Wrap the fabric over a seat edge and secure with a staple. On the opposite edge, pull fabric taut and staple to secure. Repeat on remaining two sides, then staple all around the edges, pulling cloth tight. Stop 2 inches from corners.

Step 7: Fold the fabric at one corner into a neat finish by tucking the excess underneath and smoothing the top down. Secure with three or four staples, keeping the folds flat and even; avoid stapling over the screw holes. Repeat for each corner. Once the frame is dry, reattach seat with screws.


Info: Benjamin Moore Exotic Red matte finish 2086-10; fabric similar to pictured Lakeside Ticking Stripe available from Jo-Ann.

FOUND HERE.

Good People: The Power House Project

The Power House was started by the Design 99 duo, Gina Reichert and Mitch Cope in March of 2008 with the purchase of one house and two empty lots totaling $4,900. These properties were purchased with the kind help of family members and friends.


What is a Power House?
The Power House intends to be a stimulator and not an end in itself as a singular art object. The house is a broadcaster of potential ideas and a place to plug those ideas into. It will be used as an interactive site, by Mitch, Gina and their neighbors. The Power House is meant to be a symbol for creativity, new beginnings and social interaction within a neighborhood.

upcycled free paint - renovation begins

The house is meant to act as a cultural catalyst and an opportunity for cultural exchanges through workshops and residencies. It will also provide lessons in wind, solar, and sustainable strategies by implementing these systems and introducing them to the community. Installations in the landscape will be the first outward sign that draws attention to the facility and its mission. The exterior skin of the house itself will also exhibit unique characteristics and 'green' materials and strategies appropriate for the Michigan climate. Power House will serve as a showroom both inside and out.


Why create a Power House?

The communities of Detroit have been hit hard economically for many years now. Prior to the foreclosure crisis the property values in Detroit had been extremely low, and they have hit an all time low due to the current real estate market. There has always been a need for low income housing, but often what is called low income is not really that affordable to purchase or sustain. The Power House is designed to prove that it is possible to take advantage of the housing crisis and produce super efficient, self-sustaining homes all for under $99,000. By taking advantage of today’s housing crisis, the Power House Project can help people to rethink their city's aged and decaying housing stock and bring the homes back to life.


neighbors help plant a community garden

Long Term Goals
As the foreclosure crisis hits all around them, with house after house going vacant and vandalized, they began to strategize ways of making positive changes. In 2008, Gina and Mitch purchased a bank foreclosed house in Detroit for $1900 (originally valued at $85,000), almost on a whim, simply to try and take control of their immediate surroundings which were quickly destabilizing due to a spike in foreclosures. Since the house had been scrapped- all its electrical, plumbing and heating systems stolen- the idea became to work with the house in a way that turned a negative value into a positive asset by reinventing the house as a Power House.

Positive Ideas + Interactive People = Healthier Neighborhoods
The Power house Project was designed to stimulate communication and action within an otherwise challenging but unique Detroit neighborhood by way of mining out the existing positive and productive aspects of the neighborhood. The Power House is designed to be a space where people can feel comfortable to share their ideas, knowledge and expertise about the fundamentals of neighborhood living, i.e., gardening, house work, new technologies, safety, and so on. The Power House is also designed as to be magnet for gathering whether they be neighborhood resources, energy, social change, story telling or simply a place to produce and view art and culture.

candidates for future power houses in the neighborhood

Future Power House Projects
Each Power House will be capable of creating enough energy for its own consumption and produce enough excess power for at least one neighboring home. This is feasible due to the extremely low cost of purchasing property in Detroit and the amount of available small single family vacant homes in Detroit. A certain percentage of each Power House would also function as neighborhood hubs by producing not only electricity but also a new point of identity, gathering place of creative exchange, thus a new type of neighborhood where undesirable homes become experimental factories for community action and power.

Currently they are in the process of bringing other artists in to help set up a small neighborhood radio station and sculpted landscape work.

Learn more about the Power House project and Duo 99 HERE.

Info and photos in this post credit to Design 99 and the Power House Project.

Wednesday, March 25, 2009

DIY Project: Fabric Headboard

Create a fresh headboard for spring or summer with fun fabric...here's how:


1. Have enough fabric to generously cover the front of your headboard and the back side about 5 inches in. Wrap the fabric over the top edge of headboard and secure with a staple in the center, about three inches in from the edge.

2. On the opposite edge, pull fabric taut and staple to secure. Repeat on remaining two sides, then staple all around the edges, pulling cloth tight. Stop 3 inches from corners.

3. Fold the fabric at one corner into a neat finish by tucking the excess underneath and smoothing the top down. Secure with three or four staples, keeping the folds flat and even. Repeat for each corner.

The striped fabric shown is available at Beach House Style.

FOUND HERE.

Tuesday, March 24, 2009

Series: Displaying Art and Photography - Ribbon Display

Prior to the end of the nineteenth century, pictures were often displayed on a strip of ribbon hung from a picture rail. This DIY project gives a modern twist to achieve the same effect.


Creating a changeable display
4 framed pictures 1 small empty frame 1 large empty frame 5 ft shaker tape or canvas webbing upholstery tacks drapery hooks measuring tape hammer picture nails

This project uses Shaker tape, a heavy-duty canvas strip used to weave chair seats. You can find Shaker tape at craft, sewing, and upholstery stores. Resist the temptation to use ribbon as Shaker tape is stronger, and you can pierce it without causing it to tear and fray. You can change this display frequently, without making new holes in your wall: just lift off the pictures and move the hooks. Hang one, a matching pair, or several side by side to fill up your space.

Choosing frames
Frames change the way pictures look: dark frames make them appear more vibrant, and metallic frames are reflective and draw attention to their edges. Create a floating effect by placing a larger empty frame around a small framed image instead of using a mat.

1. Calculate the length of the display by arranging photos or art on the tape and measuring. Add 1 foot, cut the tape to that length, and finish off the bottom with a V-cut.


2. To create a decorative hanger, loop the tape through the small empty frame, curling the cut end beneath the loop. Secure the tape to the frame with drapery tacks.


3. Lay the tape and pictures on a table and use a tape measure to help evenly space the frames. Attach drapery hooks to the tape at measured intervals.


4. Hang the tape on the wall and position the frames on the drapery hooks. If a picture leans forward, staple the frame to the tape from the back.


Photo credits: David Matheson for Pottery Barn.