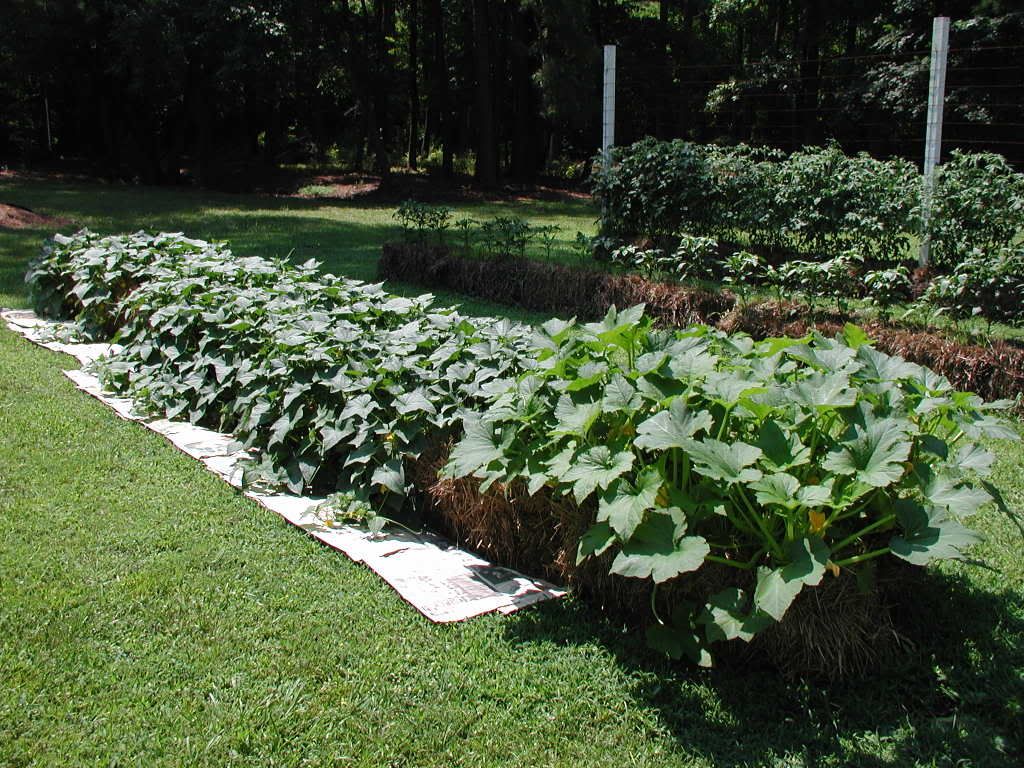
If you’re an urban gardener without enough space to grow even a tomato plant or two, “building” a garden with straw bales creates a new possibility. Rocky, uneven, or unyielding clay soil? Have difficulty stooping or bending to garden? With straw bales, you create the biodegradable equivalent of a raised bed. Plant a wonderful kitchen herb garden right next to your house, even on a concrete patio. Grow plants in a mud-free, weed-free medium that turns to mulch after a growing season or two. Straw Bale Gardening is simply a different type of container gardening. Put one on a balcony or a path or anywhere you have limited space.
Use one or multiple bales, arranging them in any pattern you like. The bales are raised but also be sure to allow for easy access to work in and around your garden. Wheat or oat straw is best as it's the stalks left from harvesting grain with very few seeds. Hay bales are less popular as they are made of whole plants with more seeds, and often other weeds in the mix. Use what you can get locally. You can get one good season out of a bale, sometimes two, but eventually it will decompose. Recycling into great compost or mulch when has eventually worn down is another bonus to this method!

Lay them lengthwise to make planting easy by just parting the straw. Make sure the string is running around each bale and not on the side touching the ground in case it's degradable twine.Keep the twine there to hold it all in place. If it starts to rot bang some stakes in at both ends, or chock up the ends with something heavy--rocks, bricks, boxes or planted containers.

Starting off with slightly aged bales of about 6 months is best, but if they're new, thoroughly soak with water and leave for five days until the temperature rises on the inside, then cools to be ready for planting. There won't be much composting inside yet as that can take months, but an initial hot cooking is not good for your plants.

The most frequent care is keeping things watered. Straw bale gardening uses more water than a normal garden, so set up a system and stick with it. In some areas a full watering can per day is enough, in warmer, drier areas keep the garden hose handy.
Straw bale gardening — plants to plant
Annuals of vegetables, herbs or flowers all work well. Remember your bales will be decomposed in 1-2 years. Young plants can go straight in. Pull apart or use a trowel, and depending on the state of the straw, mix a handful of compost soil in; then let the straw go back into place. Seeds can be planted on top if you put a layer of compost soil there first.

Top heavy veggies like corn don't work well, unless you grow dwarf varieties. With straw bale gardening staking is difficult so tomato plants will happily dangle over the edges. Each bale should take up to half a dozen trailing cucumbers, also try squash, zucchini or melons. Four pepper plants will fit in one bale or 12-15 bean or pea plants. You can add a plant or two of flowers around the edges--trailing varieties will spill over the sides and add color.

Once every 1-2 weeks water in a liquid organic feed, such as compost tea or fish emulsion. Add some earthworms on top of the soil if you want to use your bales for only one season. Pulling out any wayward grain seeds with straw bale gardening is quick and easy. Hay bales may need an occasional haircut rather than pulling the new sprouts out.